Scheduling Rides
Adding a new ride to the database can be done either from the all rides table or from the shift you are scheduling a ride for. Both lead to the same ride creation page.
Creating A New Ride from the Rides History Page
If you ever need to create a new ride without the specific shift yet, you can do so from the Rides History Page. We expect this use case will be rare.
Scroll to the bottom of the Rides History Page. Click the green “Add a Ride” button, which will take you to the Ride Creation Page.

Scheduling A New Ride from the Shift Page
This is where we expect most rides will be created from
-
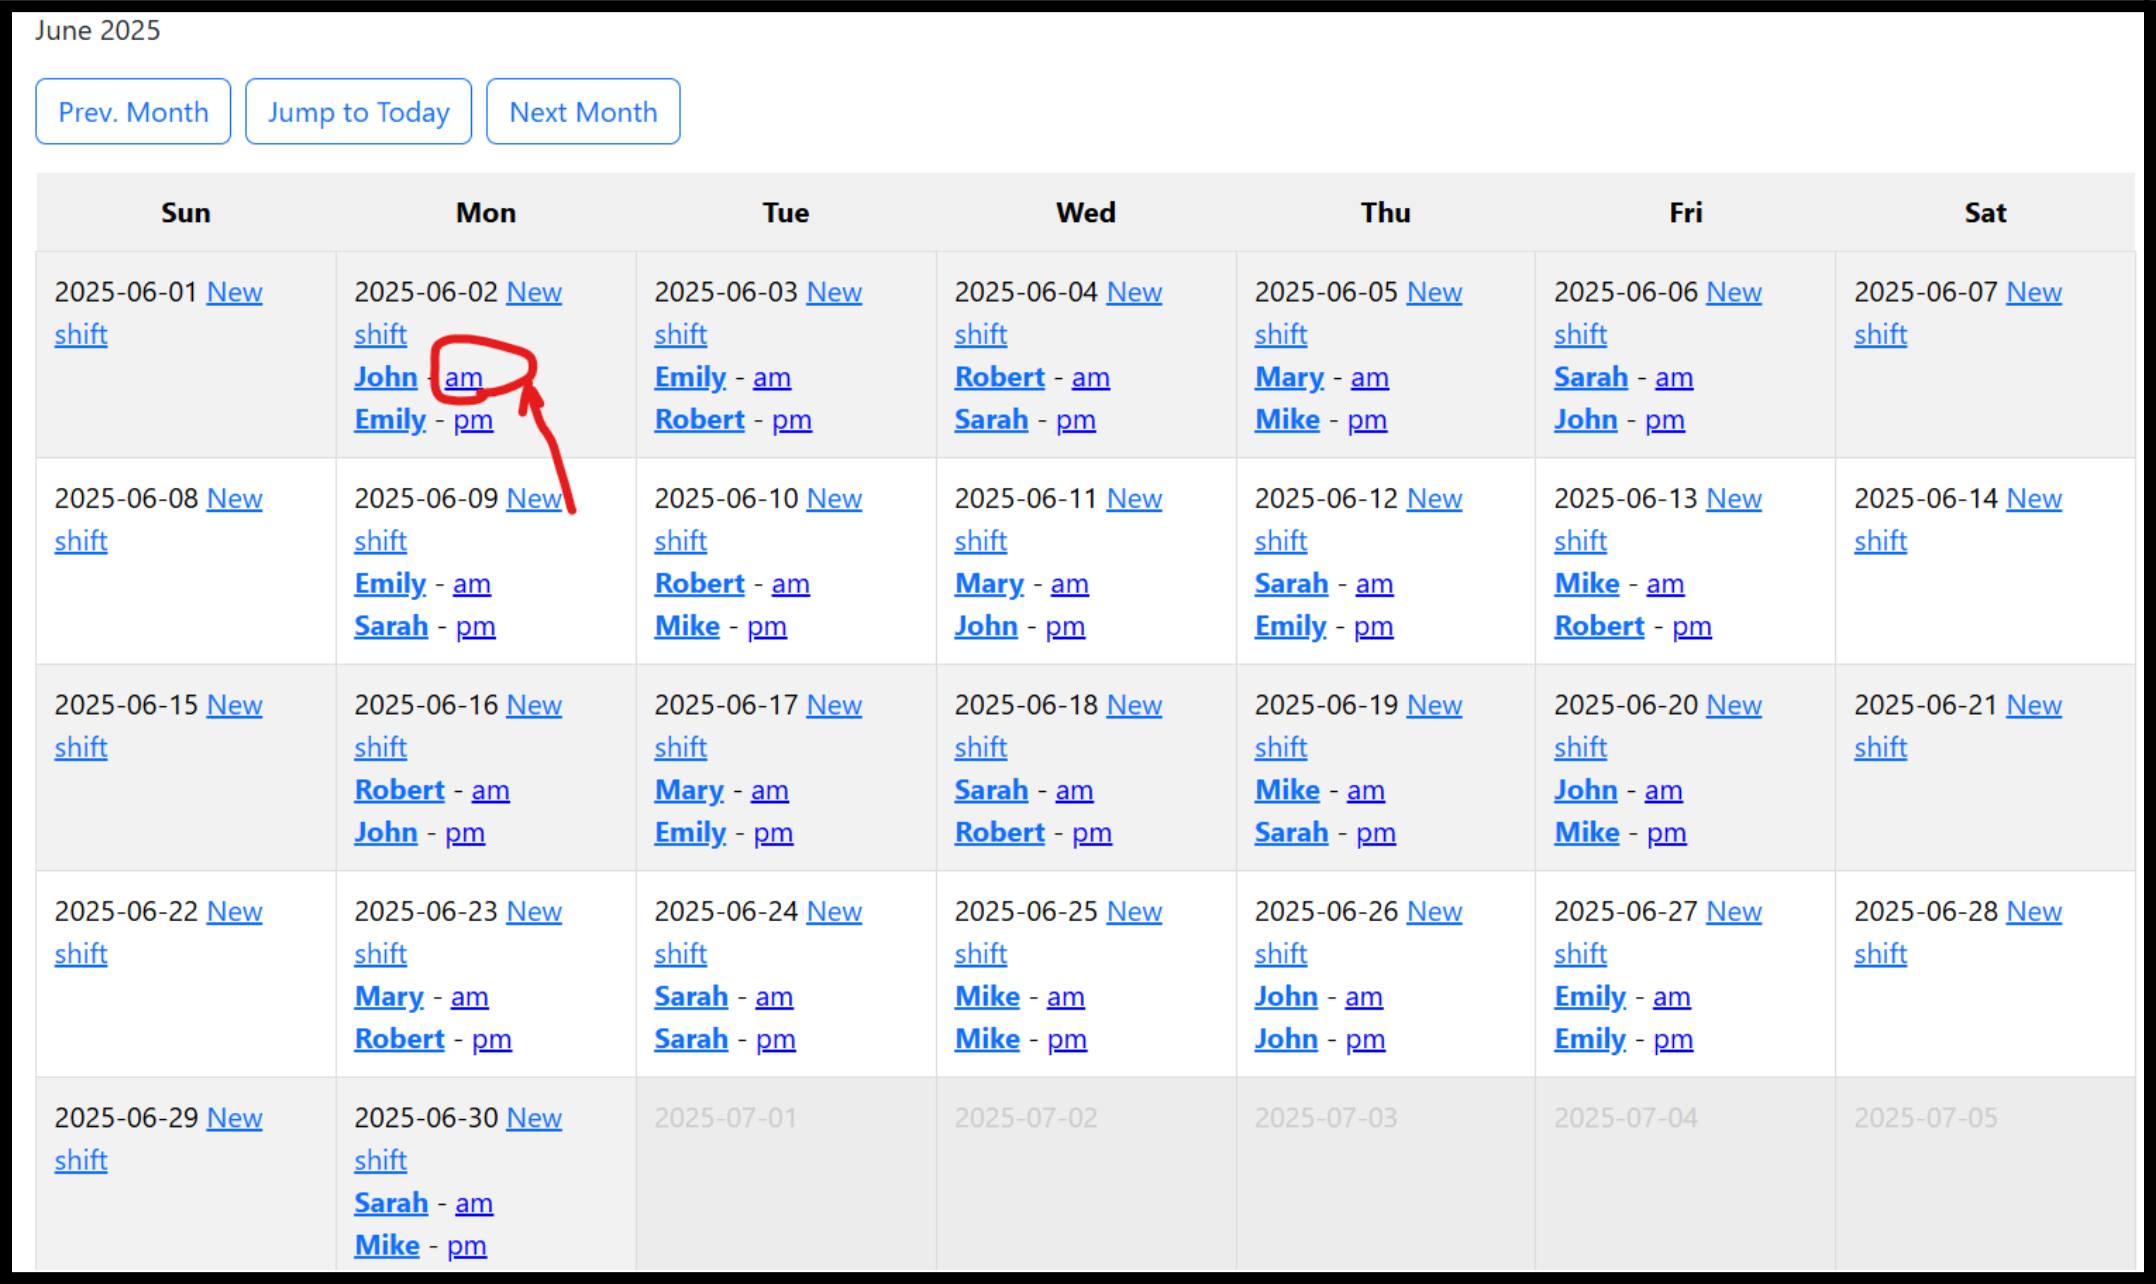
Navigate to the shift you want to create a ride for. For example, here I am navigating to the am shift with John on June 2nd.
-
This will take you to the shift view page. Here, you can see the current rides for the shift, add new rides, and edit the text field with the timeline and notes that the driver will be able to see.
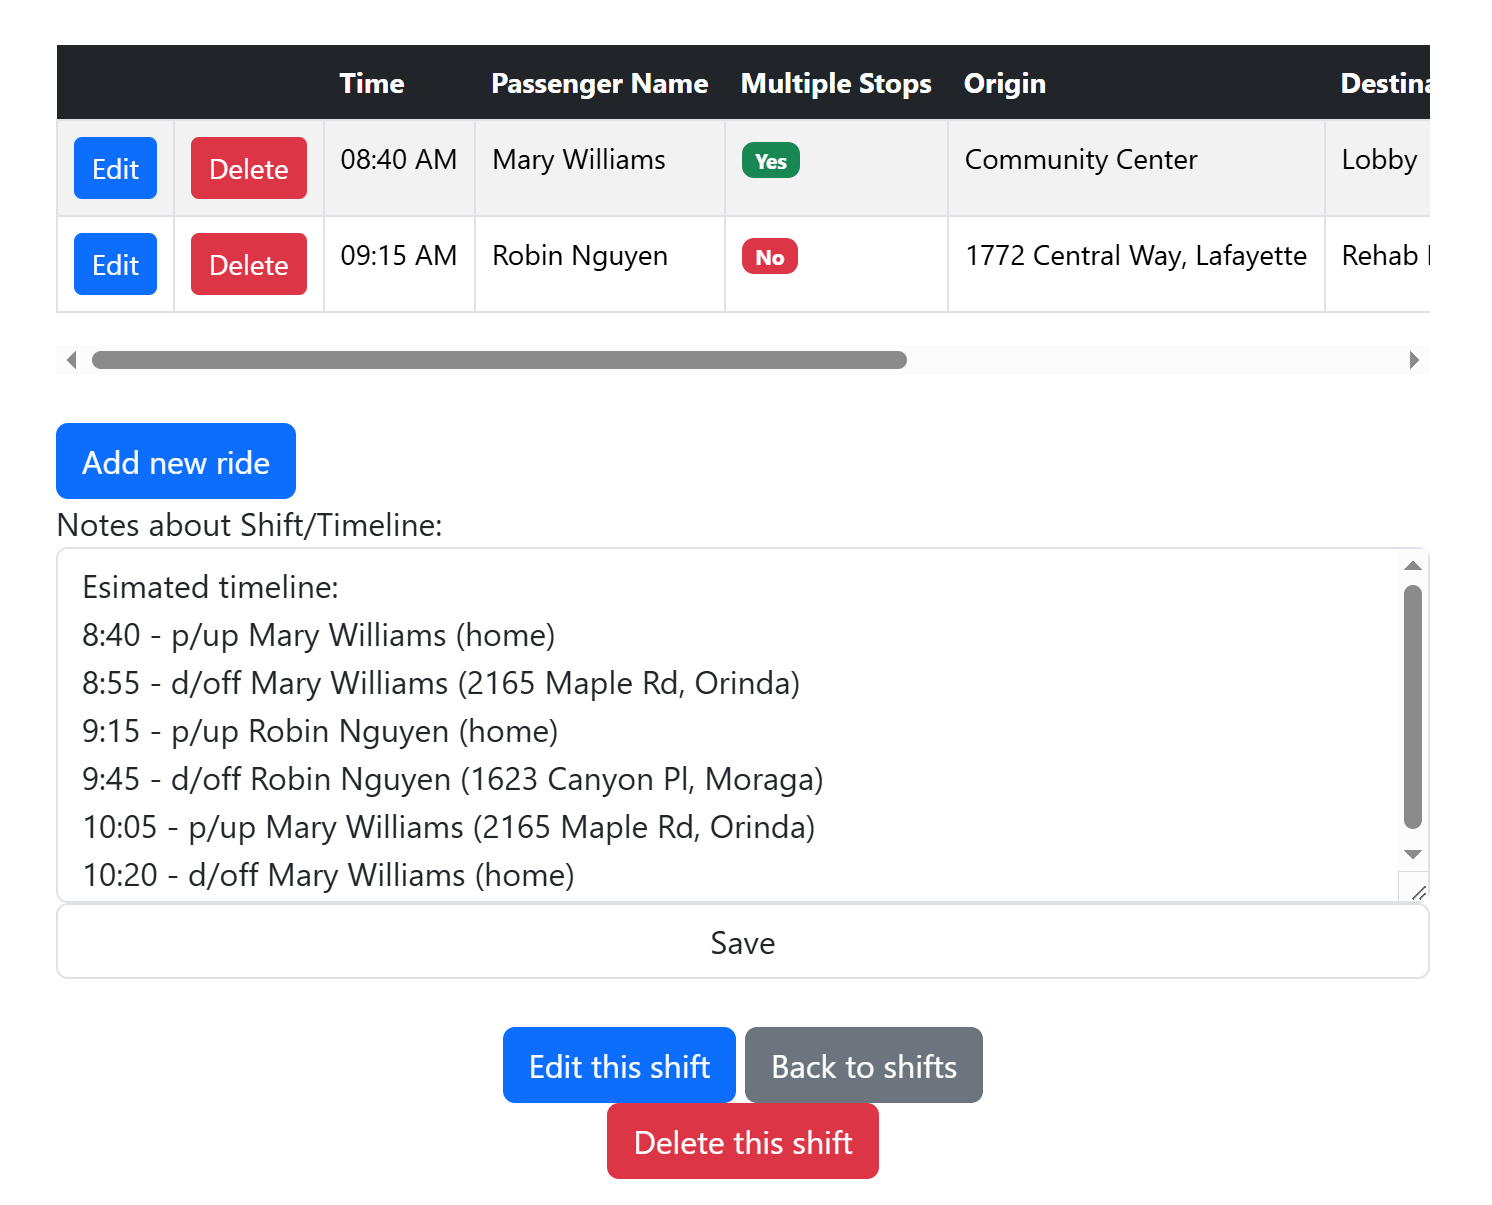
Some things to note about this page
- The estimated timeline is entered completely manually. There is no automated generation with it
- Remember to click “Save” before you leave the page
- Clicking “Edit this Shift” allows you to edit the shift date, type, and associated driver. From this page, you can click “Add new ride”. This takes you to the ride creation page, with the driver prefilled from the shift information.
Ride Creation Form
From the ride creation page, you can enter in the information about the ride. There are some notable aspects to the page:
Passenger Autocomplete
If you start typing in a passenger’s name, it will start prompting you with the names of passengers currently in the system
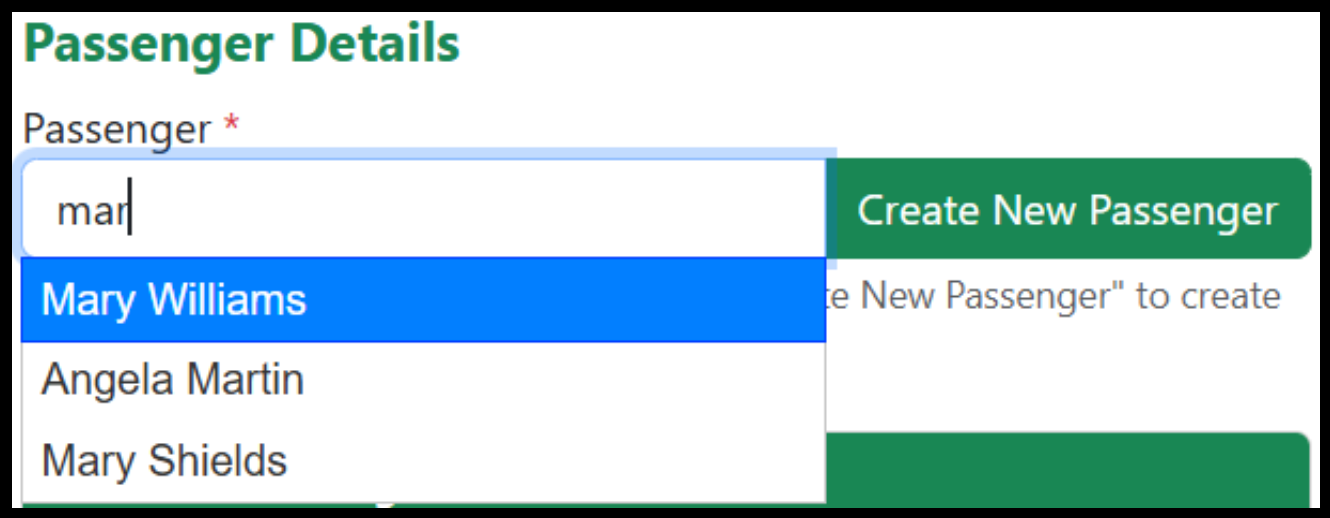
If the passenger is new, you can select the “New Passenger” button to be taken to the passenger creation page. Upon selecting a passenger, the following boxes with the passenger information will automatically fill.
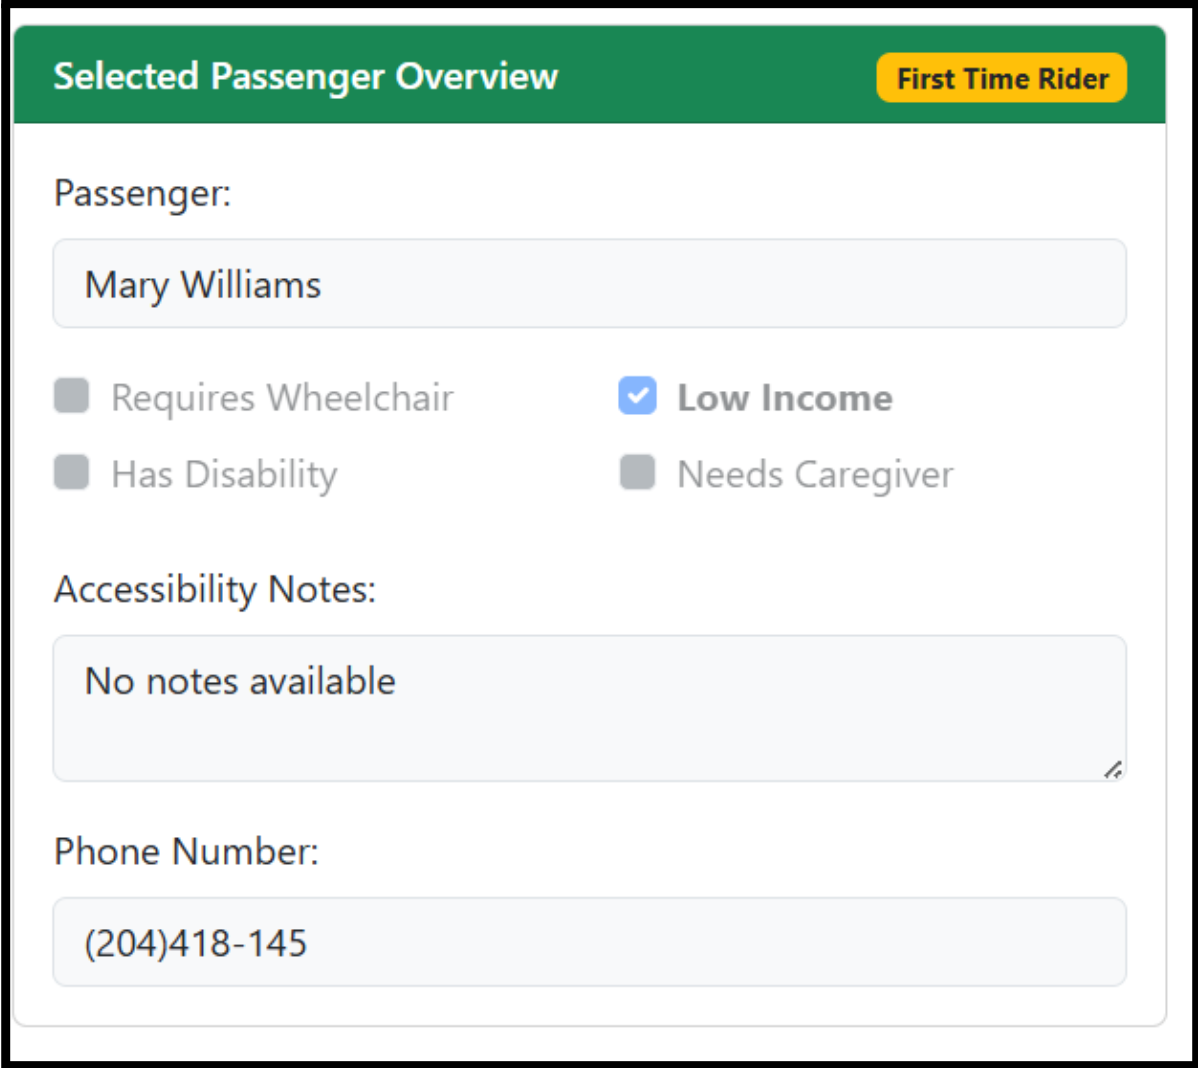
If the passenger’s information needs to be updated, that cannot be done from this page. Instead, find the passenger in the master passenger list and update the information there.
Selecting Stops
When you create a new ride, you can select an arbitrary number of stops. We expect this will primarily be used for round-trip rides, but it can also be used if a passenger has multiple destinations.
Initially, the destinations section will look like this. The origin address is automatically filled in with the home address of the passenger (this can be overwritten, however).
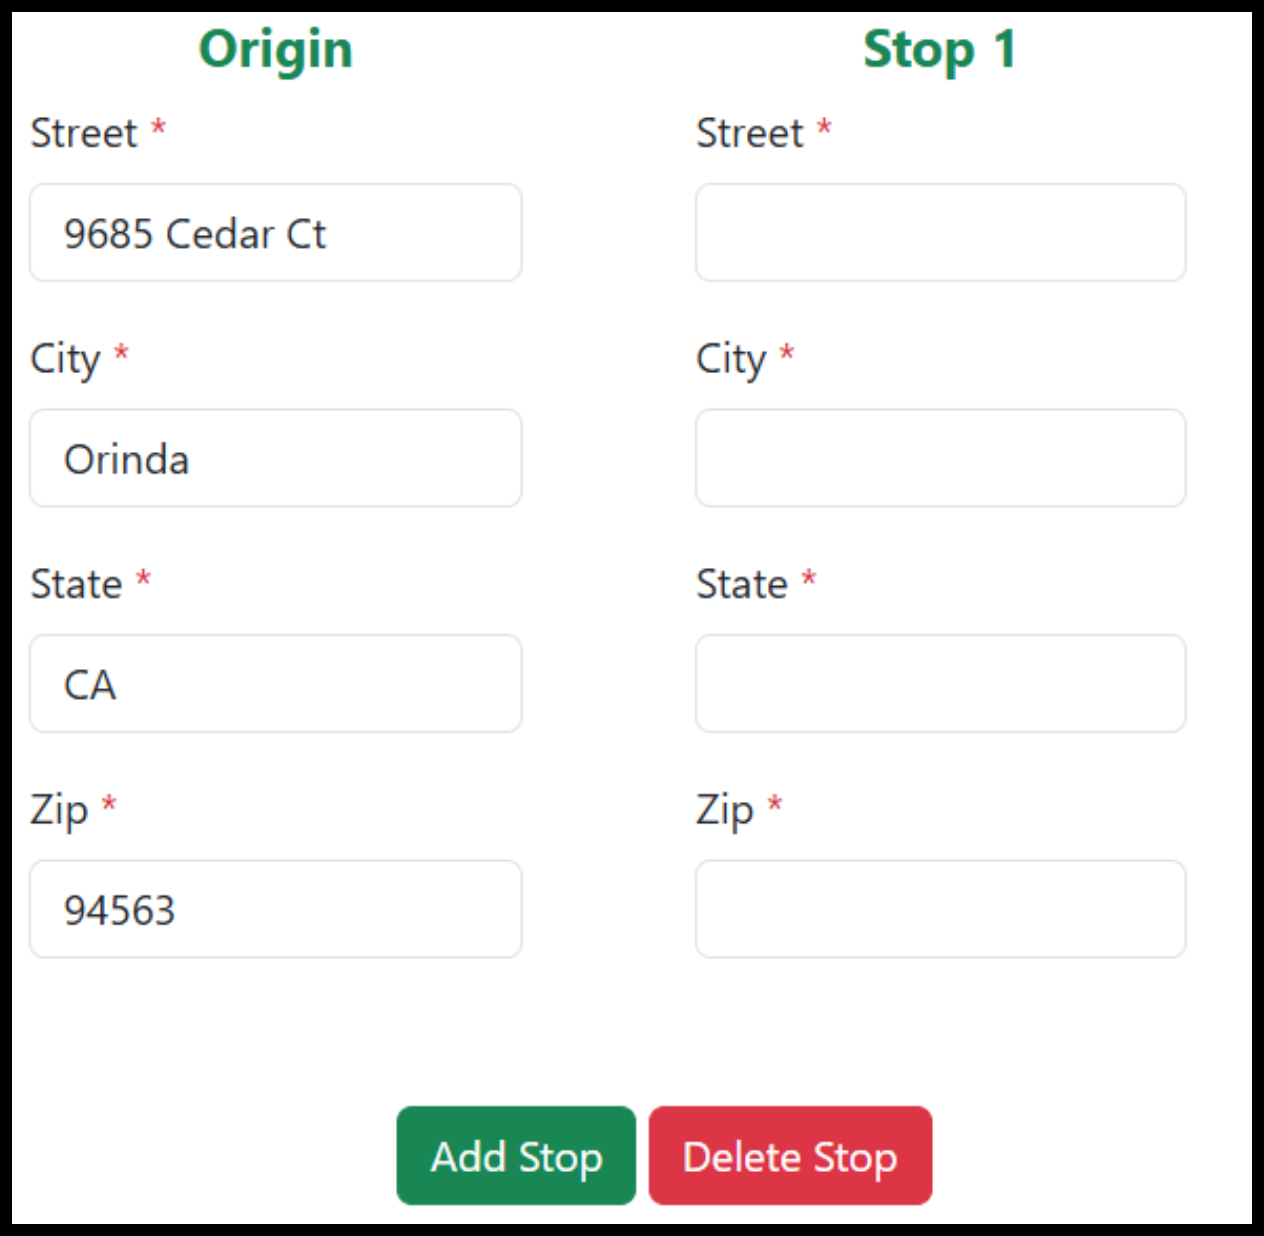
If there is more than one destination (including if the trip is round trip), simply click “Add Stop” to add an additional destination. You can add as many destinations as needed.
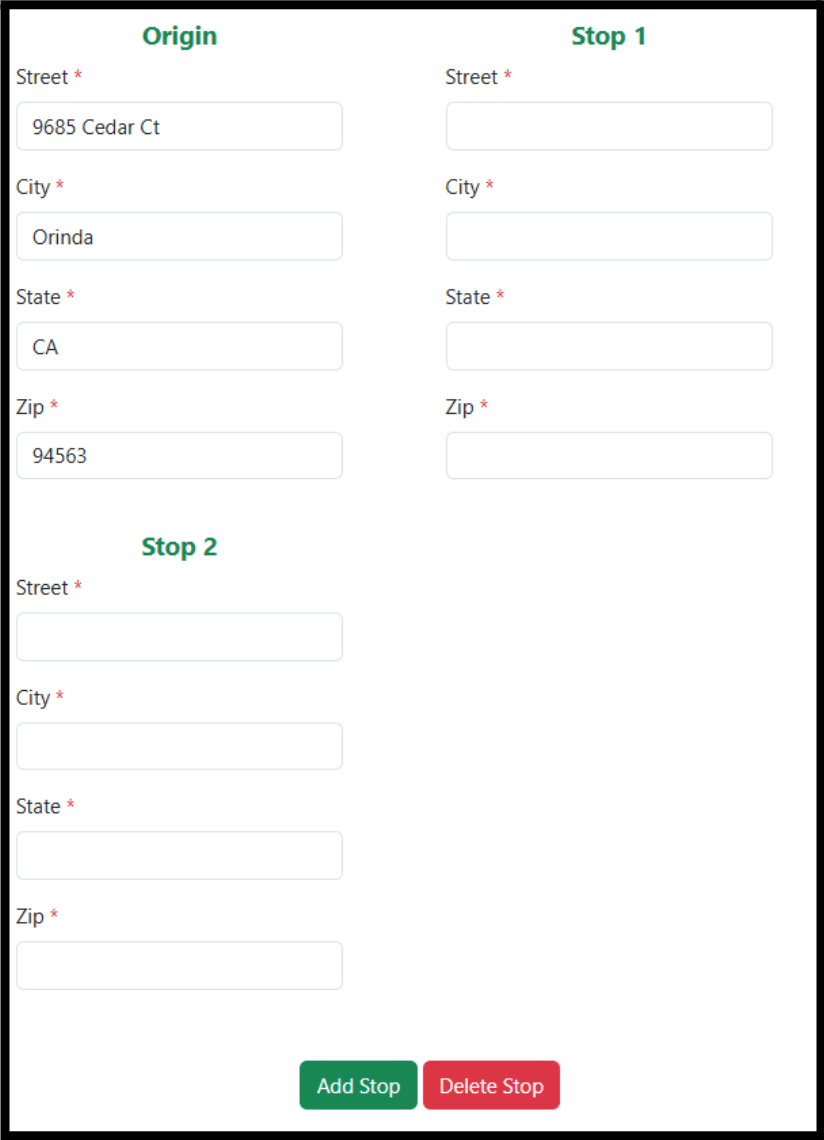
There is no special indicator for round-trip rides. Just select the home address as the final stop.